How To Remodel a Kitchen Yourself: A Step-by-Step Guide

Jordan Box • July 17, 2024
A large swimming pool surrounded by trees and a stone wall

Begin confidently transforming your kitchen by following a systematic approach—plan by evaluating the current layout, creating a detailed budget, and consulting with professionals. Demolish carefully, disconnect utilities, remove appliances first, and dispose of debris properly. Install new fixtures, ensuring secure connections, proper positioning, and suitable fittings. Finish with under-cabinet lighting, high-quality hardware, paint or backsplash, clever storage solutions, and greenery for vibrancy. Each step contributes to a successful kitchen remodel, guiding you toward a beautifully renovated space. For comprehensive kitchen remodeling solutions, consider engaging experts who can ensure every detail is meticulously handled.


Planning Your Kitchen Remodel

Before starting your kitchen remodel, it is essential to carefully plan every detail to guarantee a successful and efficient renovation process. Begin by evaluating your kitchen layout and identifying what aspects you want to change or improve. Consider factors such as the kitchen's traffic flow, functionality, and your personal style preferences. Create a detailed budget outlining costs for materials, labor, permits, and any unexpected expenses that may arise during the remodel.

Next, develop a timeline for the project, considering any potential delays or setbacks. Prioritize tasks such as ordering materials, scheduling contractors, and setting up a temporary kitchen space to use during the renovation. Research different design ideas, layouts, and materials to make well-informed decisions that align with your vision for the new kitchen.

Furthermore, consult with professionals such as kitchen designers or contractors for valuable insights and recommendations. Their expertise can help streamline the planning process and avoid common pitfalls. By meticulously planning every aspect of your kitchen remodel, you set the foundation for a successful and satisfying renovation experience.


Demolition and Removal Process

When initiating the renovation process of your kitchen, one vital phase to address is the demolition and removal process to pave the way for the transformation of your space. This phase involves carefully dismantling and removing existing fixtures, cabinets, countertops, flooring, and other elements that need to be replaced or upgraded.

To start the demolition process, ensure you have the necessary tools, such as hammers, crowbars, safety goggles, gloves, and dust masks. Begin by disconnecting utilities like gas, water, and electricity to the areas you will be working on. Remove appliances first, followed by cabinets, countertops, and flooring.

Proper debris and material disposal is essential. Consider renting a dumpster for easy waste removal. Check if donation or recycling options are available for oversized items like appliances or cabinets.

It's important to work methodically and safely during the demolition phase to avoid unnecessary damage and ensure a smooth transition to the next step, installing new fixtures and appliances.


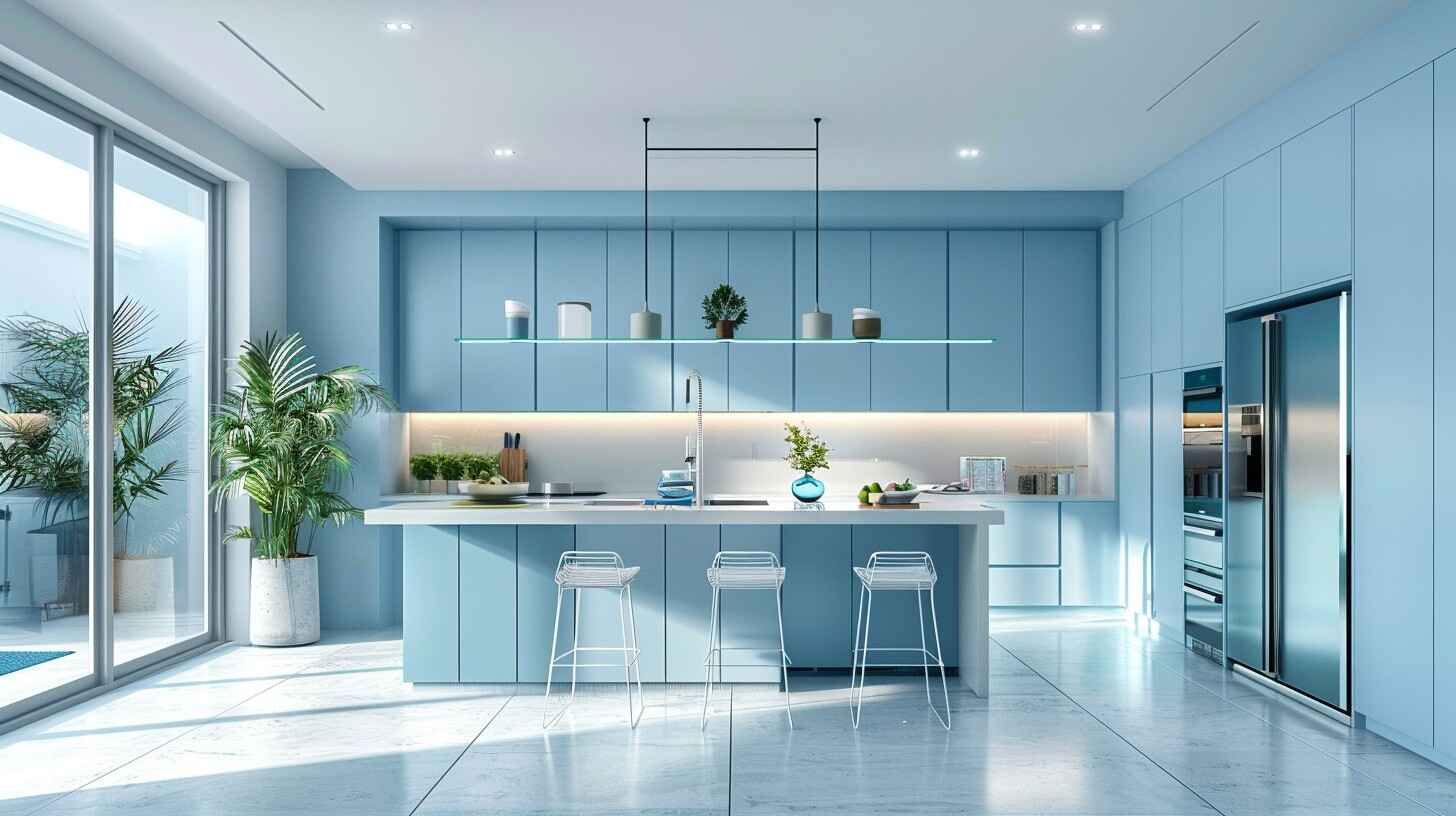
Installing New Fixtures and Appliances

Properly installing new fittings and appliances in your kitchen is fundamental for achieving a functional and aesthetically pleasing space. Attention to detail is vital when installing fittings such as faucets, sinks, and lighting. Ensure that plumbing connections are secure and fittings are level to prevent leaks or malfunctions. Proper positioning is critical for the functionality and safety of appliances like refrigerators, ovens, and dishwashers. Follow manufacturer instructions carefully, especially when dealing with gas lines or electrical connections.

Before installing new fittings, it's essential to check that they fit seamlessly with your kitchen layout and design aesthetic. Consider color, style, and size to create a coherent look. Moreover, ensure all necessary tools and materials are on hand before starting the installation process.

Properly installed fittings and appliances enhance the functionality of your kitchen and contribute to its overall appeal. By paying attention to details and following installation guidelines, you can create a practical and visually pleasing space.


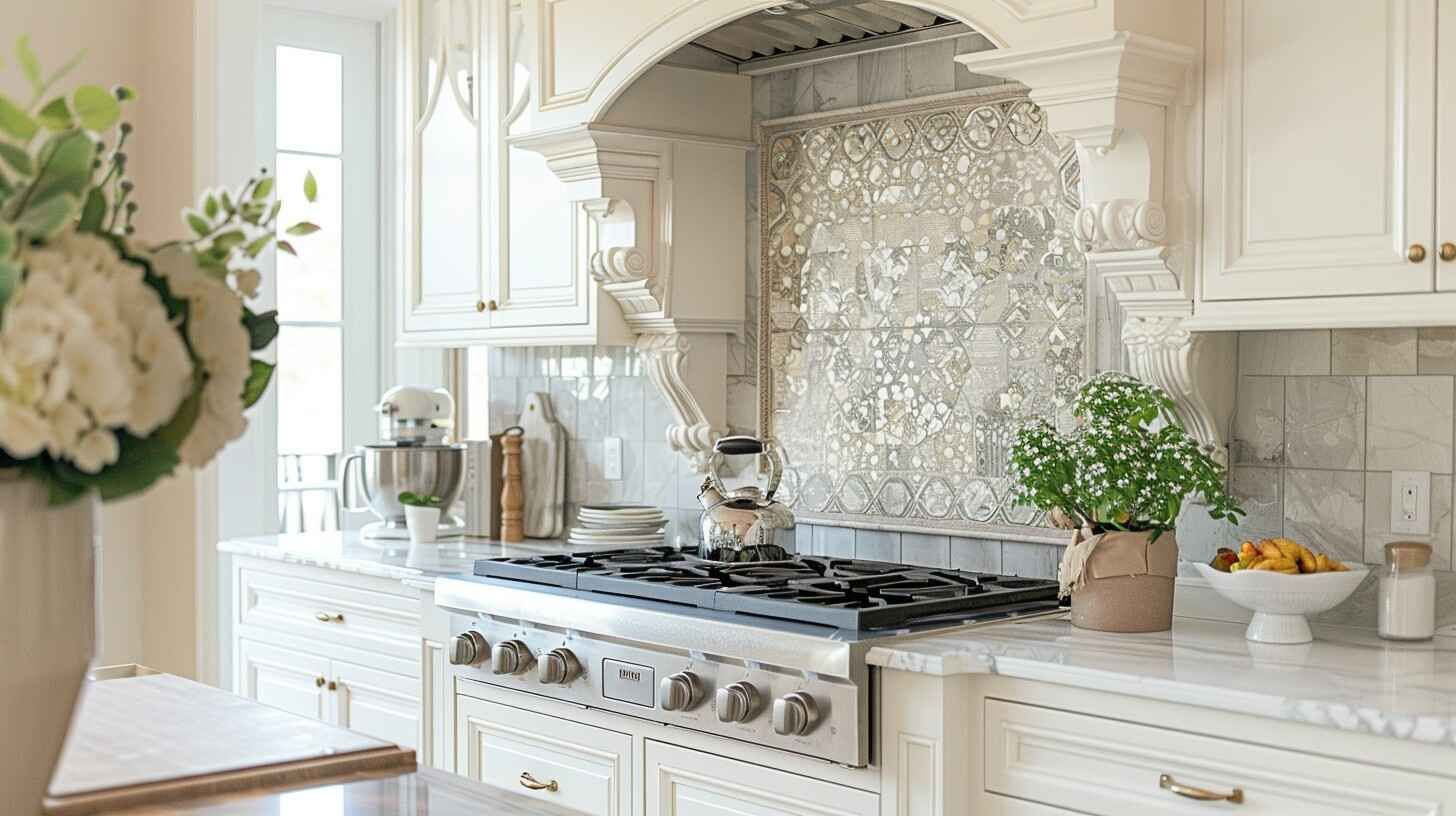
Finishing Touches and Final Tips

What are some essential finishing touches and final tips for a polished and unified kitchen transformation? Once the fixtures and appliances are in place, consider adding under-cabinet lighting to enhance your kitchen's ambiance and functionality. This subtle addition can make a significant difference in the overall look and usability of the space.

To further elevate the aesthetics, investing in high-quality cabinet hardware can provide a sophisticated touch. Whether you opt for sleek modern handles or classic knobs, the hardware can tie the design elements together. Moreover, adding a fresh coat of paint or a stylish backsplash can inject personality into the room.

Remember organization. Incorporating clever storage solutions such as pull-out pantry shelves or drawer dividers can maximize space and streamline your kitchen. To wrap it up, adding greenery or a bowl of fresh fruits can bring life and vibrancy to the room. By paying attention to these finishing touches, you can achieve a coherent and visually appealing kitchen remodel.


Other Kitchen Remodeling ideas:

By samantha Johnson October 28, 2024
Thinking about adding an ADU to your property in Southern California? ADUs are a fantastic way to create extra living space, generate rental income, and boost your property’s value. In our ultimate guide, Builder’s Innovation Group breaks down everything you need to know—from types of ADUs and their benefits to navigating legal requirements and planning your build. We’ll walk you through each step of the construction process, share tips to avoid common pitfalls, and help you find the right professionals to bring your ADU vision to life. Ready to get started? Dive into our guide and transform your property today!
By Jordan Box August 18, 2024
A typical bathroom remodel usually takes anywhere from four to six weeks to complete, covering the pre-planning, demolition, construction, and finishing stages. The process involves detailed assessments, meticulous removal of existing elements, skilled construction work, and careful attention to finishing touches. Each stage requires expertise and precision to guarantee the project stays on schedule and meets your vision for the space. If you're interested in learning more about the specific tasks involved in each stage of a bathroom remodel, the following outline outlines the key steps to achieve a successful renovation. Pre-Planning Stage During the pre-planning stage of a bathroom remodel, thorough assessment of the existing space and consideration of desired changes are fundamental steps to guarantee a successful project execution. Before diving into demolition and construction, it is vital to evaluate the current layout, plumbing, electrical systems, and overall functionality of the bathroom. This assessment helps in identifying any potential issues that may arise during the renovation process and allows for proper planning to address them effectively. Additionally, determining the desired changes and goals for the remodel is key to setting a clear direction for the project. Whether the aim is to increase storage space, improve aesthetics, or enhance functionality, having a well-defined vision helps in making informed decisions throughout the renovation process. Considerations should also be made regarding budget constraints, timeline expectations, and any specific requirements or preferences of the homeowner. Demolition and Removal Upon commencing the demolition and removal phase of a bathroom remodel project, meticulous planning and precise execution are essential to guarantee a smooth transition from the pre-planning stage. This phase involves the careful removal of existing fixtures, cabinetry, tiles, and any other elements that are being replaced or upgraded. It is vital to have a detailed plan in place outlining the sequence of removal to minimize disruptions and maintain the safety of the construction team and the property. The demolition process typically starts with shutting off utilities like water and electricity to the bathroom to prevent accidents. Next, the removal of fixtures such as sinks, toilets, and bathtubs is undertaken systematically to avoid damage to surrounding structures. Walls and flooring are then addressed, with special attention given to any potential issues like mold or water damage that may be uncovered during demolition. Proper disposal of debris is also an essential aspect of this phase, ensuring compliance with waste disposal regulations and maintaining a clean and organized work environment for the upcoming construction phase. Construction and Installation The construction and installation phase of a bathroom remodel project demands careful attention to detail and skilled craftsmanship to guarantee the successful transformation of the space. This stage involves the actual rebuilding and installation of new elements in the bathroom, such as plumbing, electrical wiring, flooring, cabinetry, and fixtures. Professional contractors with experience in bathroom renovations are essential during this phase to make sure that everything is installed correctly and up to code. During construction and installation, precise measurements, cutting, and fitting of materials are necessary to achieve a coherent and functional design. Plumbing and electrical work must be done meticulously to prevent future issues. Proper installation of tiles, countertops, and fixtures is important for both the aesthetic appeal and functionality of the bathroom. Timely completion of this phase is vital to keep the project on schedule and within budget. Effective communication between the homeowner and the contractors is crucial to address any unexpected challenges that may arise during this phase. Finishing and Final Touches To achieve a refined and integrated final result, the finishing and final touches phase of a bathroom remodel focuses on careful attention to detail and the installation of decorative elements that enhance the overall design aesthetic. During this critical stage, all elements come together to create a harmonious and visually appealing space. This phase involves installing fixtures such as faucets, lighting fixtures, towel bars, and mirrors. Each item is carefully selected to complement the overall design scheme and guarantee functionality. In addition to fixtures, finishing touches may include grouting tiles, sealing countertops, painting walls, and adding trim work. These steps require precision and expertise to guarantee a flawless outcome. Details such as selecting the right paint color, choosing the perfect hardware finishes, and placing accessories strategically can elevate the design to a whole new level. Paying attention to these final details is vital in transforming a standard bathroom into a luxurious retreat. Ultimately, the finishing and final touches phase is where the vision of the remodel comes to life, showcasing the homeowner's style and creating a space that is both beautiful and functional. Other Kitchen Remodeling ideas: Steps to Successfully Remodel Your Bathroom When Remodeling a Bathroom, What Comes First?
By Jordan Box August 18, 2024
Upgrade your bathroom affordably with these tips: update fixtures, paint walls, and enhance lighting. DIY projects like repainting, changing hardware, and adding decor can transform the space. Consider affordable fixture replacements to boost style and efficiency. Utilize intelligent storage solutions like floating shelves and vanity organizers to maximize space. These strategies from bathroom remodeling contractors offer a cost-effective way to refresh your bathroom. Budget-Friendly Bathroom Design Ideas Integrating budget-friendly design elements can significantly enhance the aesthetic appeal of a bathroom renovation project without breaking the bank. One economical idea is to focus on updating the fixtures in the bathroom. Swapping out old faucets, showerheads, and drawer pulls with modern, stylish alternatives can give the space a fresh look without a hefty price tag. Another tip is to paint the walls a new color or add a trendy wallpaper accent wall. This simple change can transform the entire feel of the bathroom without the need for a complete renovation. Additionally, updating the lighting fixtures can significantly impact the overall design of the bathroom. Installing energy-efficient LED bulbs or stylish sconces can add a touch of elegance and modernity while keeping costs low. Lastly, integrating new accessories such as towels, rugs, and artwork can tie the design together and give the space a coherent and polished look. A bathroom renovation can be affordable and visually appealing by focusing on these budget-friendly design elements. DIY Bathroom Renovation Tips To further improve your bathroom renovation project while reducing costs, consider implementing DIY bathroom renovation tips. These tips can add a personal touch and save money. DIY projects allow for customization and provide a sense of accomplishment. Start by repainting the walls or cabinets to give the bathroom a fresh look. Changing the hardware, such as drawer pulls and faucet handles, can also significantly impact at a low cost. Installing new light fixtures or updating the mirror frame can modernize the space. Consider tackling small tiling projects like a backsplash or accent wall, which can elevate the bathroom's aesthetic appeal. Replacing old caulk and grout can make the area look cleaner and more polished. Moreover, creating your decor pieces, like shelving or artwork, can add personality without breaking the bank. Remember to research techniques and gather the necessary tools before starting any DIY project to ensure a successful and cost-effective bathroom renovation. Affordable Fixture and Fittings Upgrades Consider cost-effective ways to upgrade fixtures and fittings in your bathroom to enhance its overall look and functionality without overspending. When upgrading fixtures on a budget, consider replacing old faucets and showerheads with newer, more efficient models. Fixtures like these not only improve the bathroom's aesthetic appeal but can also help save on water usage in the long run, reducing utility costs. Another affordable upgrade is replacing worn-out cabinet hardware with stylish and modern alternatives. This simple swap can instantly revamp the look of your bathroom vanity or storage cabinets without needing a total replacement. Additionally, updating lighting fixtures can significantly impact the ambiance of the space. Consider energy-efficient LED bulbs or stylish fixtures that complement the bathroom's overall design. Maximizing Storage in a Small Bathroom Efficient use of available space is crucial when maximizing storage in a small bathroom. In a limited area, every inch counts, making clever storage solutions essential. Consider installing floating shelves above the toilet or next to the sink to store toiletries and towels without occupying precious floor space. Using the back of the bathroom door with an over-the-door organizer can provide extra storage for items like hair tools, cleaning supplies, or extra toiletries. Opting for a vanity with built-in storage or adding baskets underneath the sink can help keep the countertop clutter-free. Vertical storage solutions, such as tall cabinets or ladder shelves, can maximize space while drawing the eye upwards, creating the illusion of a larger bathroom. Moreover, incorporating mirrored cabinets adds storage for medicines and cosmetics and reflects light, making the space feel brighter and more open. Other Kitchen Remodeling ideas: How Long Does a Bathroom Remodel Take? Steps to Successfully Remodel Your Bathroom